
Contact
Kathmandu,Nepal
9745652548 / 49
Table of Contents
If you are running a business, whether it’s a small or large business, you need a website and to run a website you need hosting. Are you planning to change your hosting provider? If so, then here Yoho.Cloud is the one who can help you in hassle-free migration from one provider to another. We try to help you to migrate your website as easily as possible.
You just need to know a few ideas to transfer hosting. Here we will provide you with some tips to make sure that things go smoothly during your migration. Here we will discuss some pre-migration tips, tips during migration, and some post-migration tips so that you can easily transfer your hosting from another provider to another.
Here in this article, we will guide you to migrate your hosting from an old provider to the Yoho.Cloud platform:
1: Pre-migration tips before migration:
Learn some tips to transfer hosting from other providers to Yoho.Cloud.
Below we have explained some of the pre-migration tips for moving to Yoho.Cloud:
- Chat or Call to us
Before your migration, just call us or chat online with us so we can discuss your needs. There are a lot of factors to consider – and it’s what we do every day. Let us help you figure out what needs to be done. Moving to Yoho Cloud is free and smooth with our internal migration tools without any downtime and our migration team will migrate all your data from the previous server to ours without any extra charge. If you want to do the migration yourself then you can check the below steps.
- Ensure a shorter DNS Time To Live (TTL)
The IP address of your site or hosting will change when you migrate it to Yoho.Cloud. It will change from one of your current hosting host’s numbers to one of Yoho.Cloud’s. It maps the name of your site (e.g. www.yoursite.co.uk) to this identifier (e.g. 101.101.101.101).
Visitor IP addresses are retrieved from DNS nameservers in the background whenever they browse your site. The requests are cached so that they are not repeated each time. Caching time is defined by the TTL. We recommend reducing the TTL for your DNS nameserver records and for your site’s A record a few days before the migration in order to ensure that the migration goes smoothly and your site can be accessed again quickly after it has been migrated.You may use the 3rd party DNS provider like cloudflare DNS which least DNS propagation time compared to others.
- Make sure you do not cancel your current hosting service
If you are switching from your current host to Yoho.Cloud, make sure you do not cancel your current hosting service immediately. You may need it for some time until you get your site up and running on Yoho.Cloud and test it.
- Either change your domain registrar to Yoho.Cloud or let it be with your current provider
It is possible to have your domain registered with any registrar you choose and then either point individual records – such as your website’s A or MX records – to another registrar or to point your domain’s nameserver records to another registrar.
With Yoho.Cloud all your DNS records are configured automatically – for your website, your email, etc. – once you transfer your domain to Yoho.Cloud. You can also host your domain with your own registrar, but you will need to either point specific DNS records to Yoho.Cloud, or switch your nameservers to Yoho.Cloud and use Yoho.Cloud’s DNS for your domain.
In the case of third-party email services such as Google’s G Suite and Microsoft’s Office365 Exchange service, you might need to duplicate any DNS records before you actually change the nameservers to Yoho.Cloud if you’re planning to transfer or change your domain.
2. During Migration:
Once you are ready with your migration plan, know how you can migrate your files manually to your new hosting provider from your current one.
Below we will tell you how to migrate manually without using any plugin.
Steps to migrate files manually from other providers to YohoCloud
With Yoho.Cloud your entire website can generally be relocated from your current hosting to YohoCloud in less than an hour.
So let’s begin the migration steps to Yoho.Cloud.
Step 1: Sign up for Yoho.Cloud hosting
Get a cheap web hosting plan in Nepal. You will find different packages at affordable prices. Compare the packages, you will surely appreciate its value for money if you host with Yoho.Cloud.
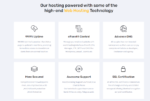
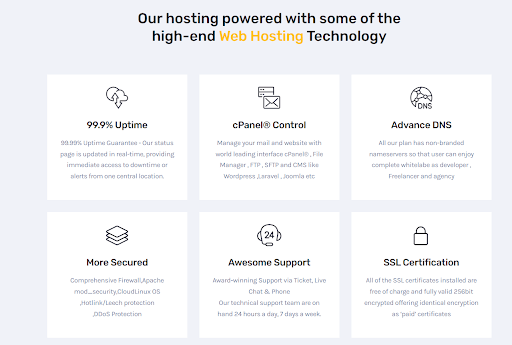
What makes Yoho.Cloud a good web hosting provider?
- 99.9% Uptime
- CPanel Control
- Advanced DNS
- More Secure
- Awesome Support
- Free SSL Certification
Step 2: Save your WordPress files
- Go to your previous hosting provider’s account.
- Click Manage in the Web Hosting tab.
- Your cPanel will appear after that. Click on the File Manager icon under the Files section.
- You will find the public_html folder on the left-hand side panel. If you click on it, you will find all your files on it.
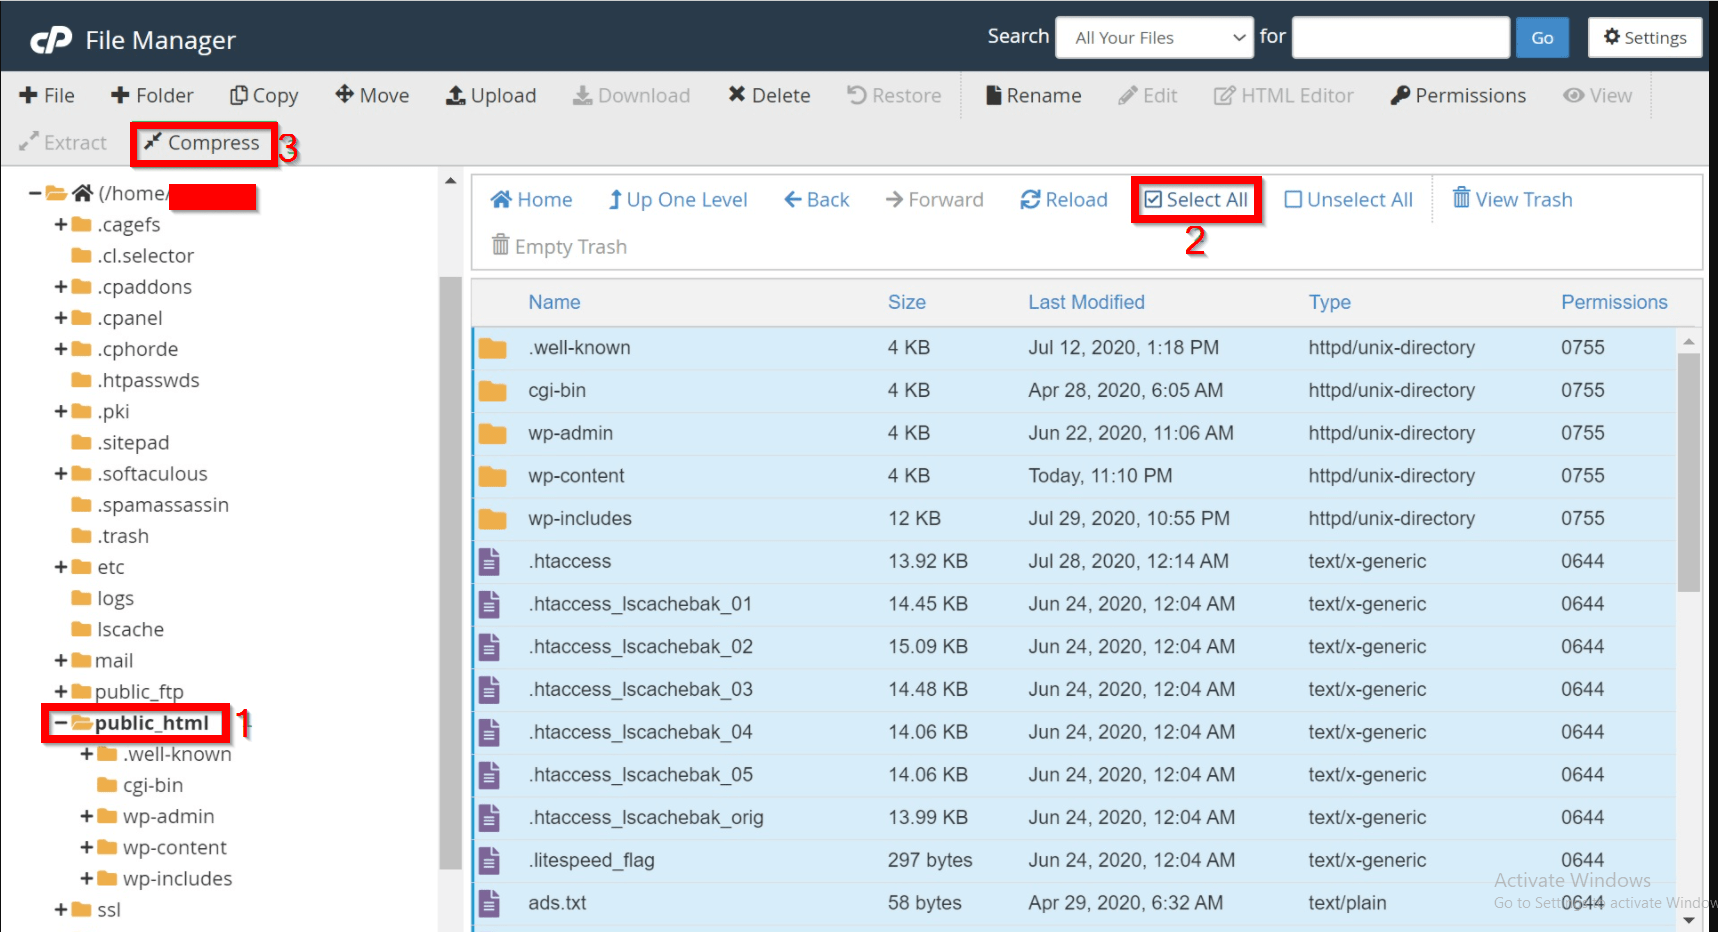
- Choose all the files and click Compress.
- Select the Zip Archive and click Compress.
- Note the location of the archive. The target location should be in the public_html folder as it is by default.
When the compression is complete, select the newly created zip file and hit Download.
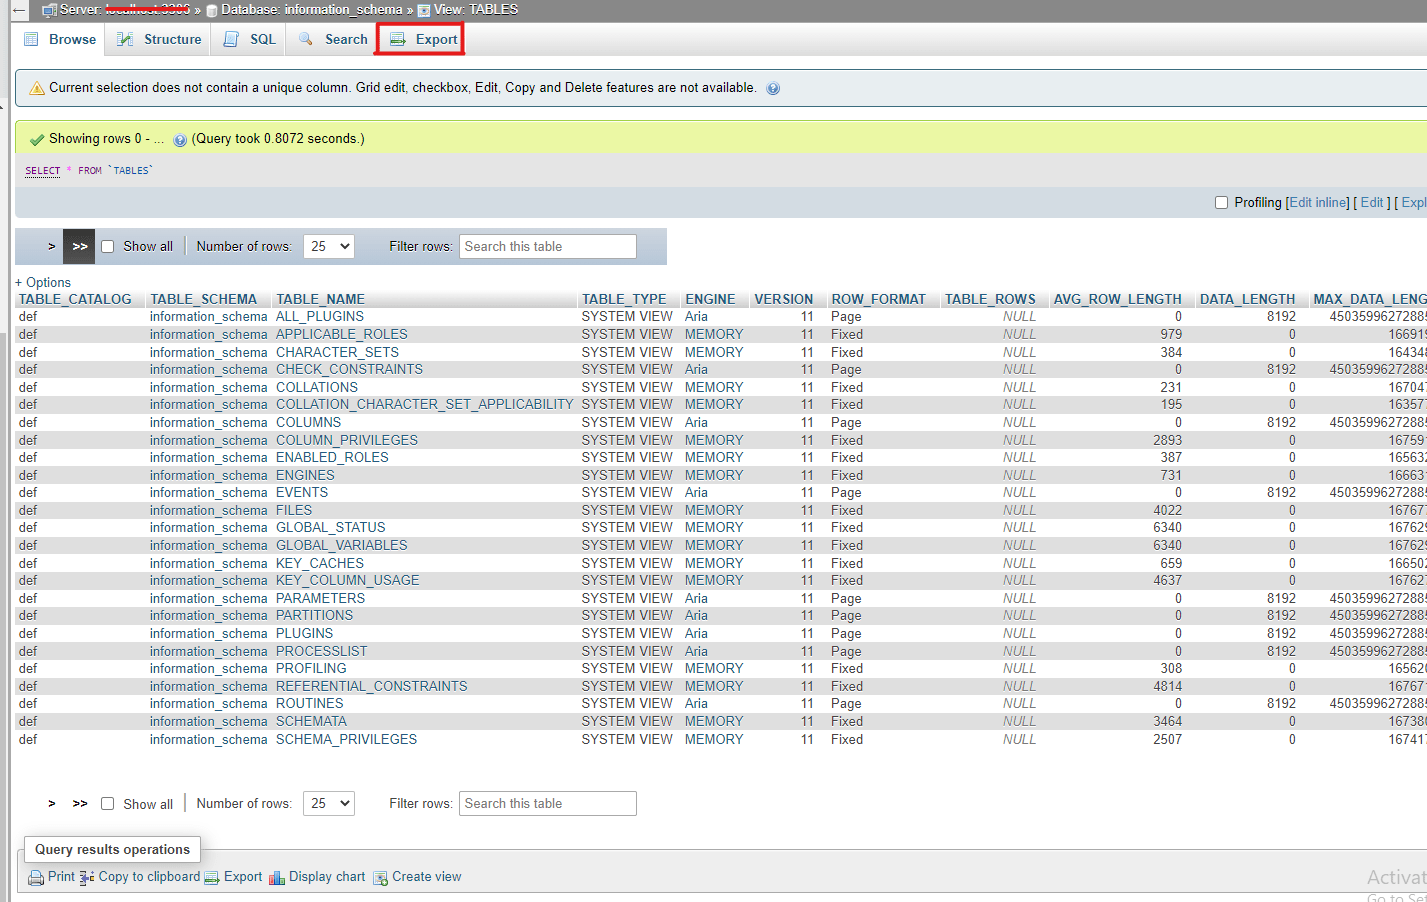
Step 3: Export your database from the previous hosting
- Open your cPanel and go to the Databases section and tap on phpMyAdmin.
- A list of your databases will appear on the left. Simply click on your database. Various tables, such as comments, posts, etc., will appear as the database expands to the right.
- Click Export from the top menu.
- Select the Quick and Format options for Export and select SQL. Then hit Go. The database will be downloaded.
Step 4: Connect your domain to Yoho.Cloud Hosting.
- Sign in to Yoho.Cloud with this link https://portal.yoho.cloud/register.php
- Choose your choice of hosting package
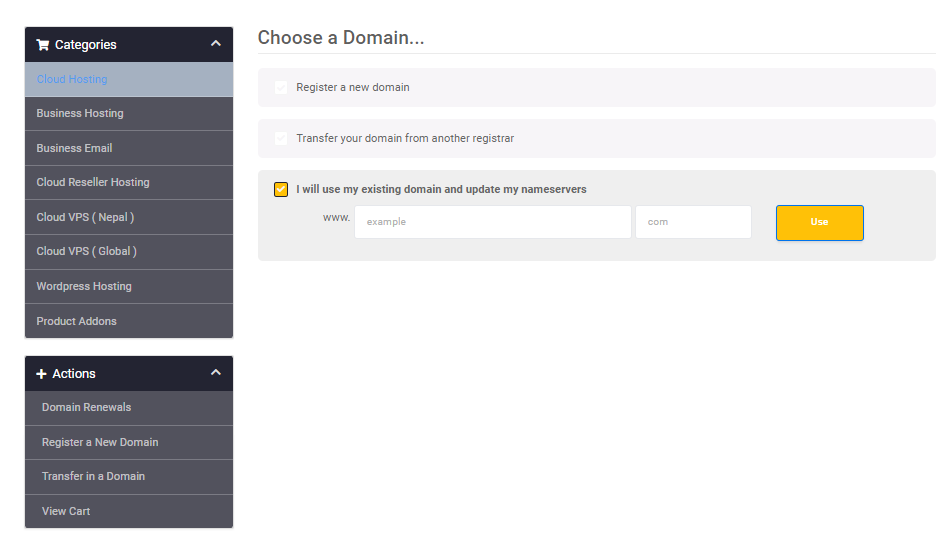
- Then purchase one and then click I will use my existing domain and update my nameservers
- Then enter your own custom domain and click Use.
Continue with payment options by clicking Checkout. You can pay with Paytm, Debit Card, Paypal, and other popular payment methods. As soon as your payment is processed, we’ll send you an email confirmation and SMS on your phone.
Step 5: Change Domain Nameservers.
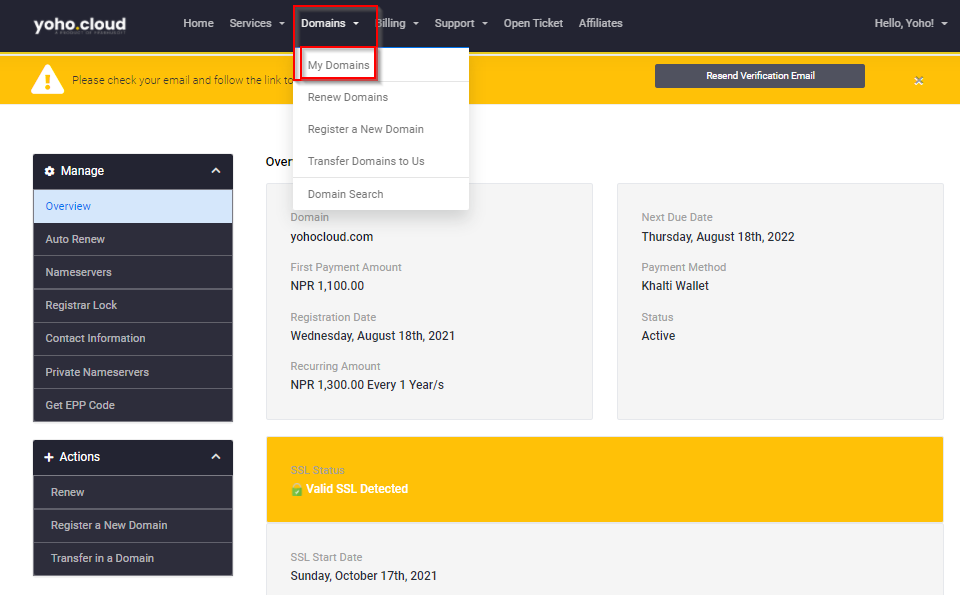
- Click on My Products at the top of the page to return to your previous hosting account (and expand the Domains tab this time). Or click on My domains at top.
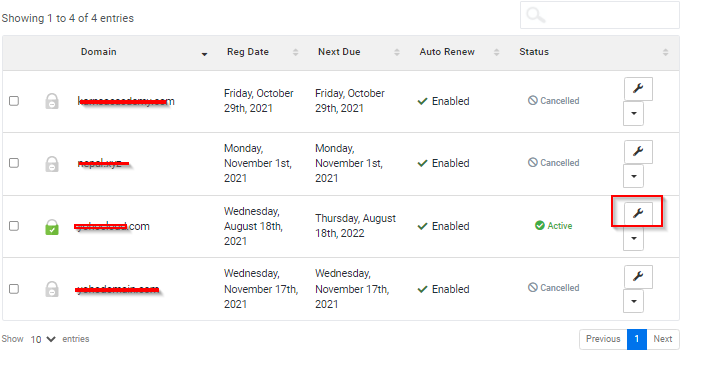
- Click on the settings icon to manage DNS as shown in the screenshot below.
- After clicking you will see a new page and on the left you will see the Nameservers tab.

- Change the previous hosting nameservers with the Yoho.Cloud nameservers. Yoho.Cloud’s nameservers will be like this: ns1.yoho.cloud and ns2.yoho.cloud
- Please save your changes. You will be able to access your domain from now on. The nameservers can also be found on the main page of your Yoho.CloudAccount:
Step 6: Upload WordPress files to Yoho.Cloud
- Go to the CPanel of your Yoho.Cloud Account and open File Manager.
- You will need to upload the zip file you downloaded from the previous hosting provider in Step 2 by clicking on Public_Html folder > Upload in the top menu.
- Select the zip file, and click ‘Extract’.
Step 7: Set up a new database in Yoho.Cloud
- Go to cpanel and click on MySQL Databases.
- You will need the database name (including the prefix) in step 8, so click Create database. You will see something like akgdom_DB1
- The next step is to add a new user, i.e. user1. Input username and password including prefix – prefix_user1 and password. Press Create User.
- Click Add to add the newly created user to the database you just created.
Step 8: Move database to Yoho.Cloud
- Again login to YohoCloud cPanel and click on phpMyAdmin.
- Find the database you created in step 7 and click on it (if you cannot see it, click on the + sign to expand the folders).
- You need to import the database you downloaded from your previous hosting provider in step 3.
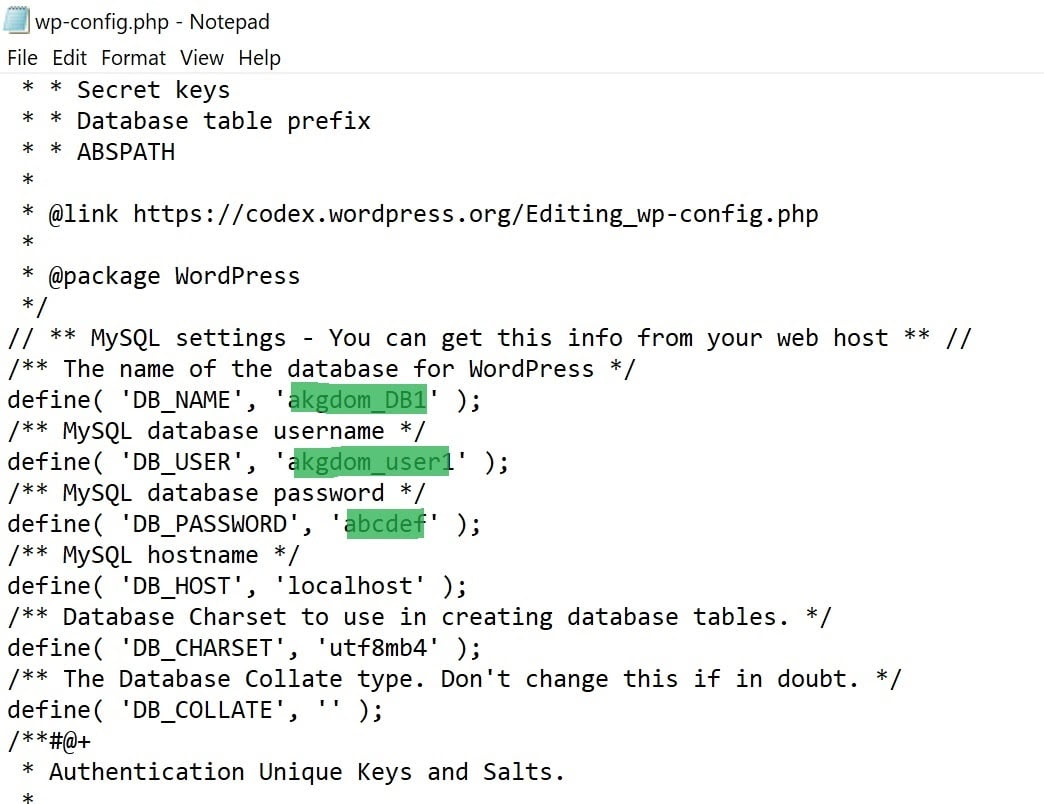
Step 9: Open the wp-Config.php file in Public_html
- From the top menu, select Hosting.
- Click File Manager under the Files section, just like before. In a popup window, select the directory you want to open. From the drop-down list, select Document Root and your domain name. Click the Submit button.
- Open wp-config.php with Code Editor.
- Then, find and replace the DB_NAME, DB_USER, and DB_PASSWORD selected with the database names, usernames, and passwords created in step 7: As illustrated below:
- Then, save it.
Step 10: Save the permalink
- Sign in to your WordPress dashboard as usual.
- Save your Permalinks by going to Settings >> Permalinks.
3. Post-migration tips after migrating to Yoho.Cloud
Finally, once you complete your migration process from your previous hosting to Yoho.Cloud, follow some post-migration tips. Post-migration tips are to make sure that you have successfully transferred hosting from other providers to Yoho.Cloud without any errors.
Below we have mentioned Post-migration tips after migrating to Yoho.Cloud:
- Check if your Nameserver is correctly pointed to our nameserver or not
- Do not change anything for at least 24 hrs after migration because the period is called propagation time and change may not reflect or change you did may get to the previous server.
- After migration login to Cpanel and check every possible folder/file/database and email correctly migrated or not. If you find anything missing, let us know via the support ticket from the clientarea.
- After migration do change your Cpanel password from our clientarea.
Thus, you are now ready to run your website with Yoho.Cloud. Like this you successfully transferred your hosting from other providers to Yoho.Cloud.

How to make an eCommerce Website within a few minutes?
Editorial StaffCpanel vs Plesk: Which hosting panel is best ?
Editorial Staff