

Contact
Kathmandu,Nepal
9745652548 / 49
Table of Contents
Do you want to use your Gmail and Outlook email address with your domain name? Of course, you may want to if you have your own business website. Because when you use domain-based emails, it looks professional and is more trustworthy to customers.
If you use email addresses like @gmail.com or @outlook.com, that can appear unprofessional. So, a custom domain email address offers a solution to that problem.
Besides, many business professionals find it convenient to configure domain-based emails into Outlook and Gmail. This makes handling client communications much simpler directly from Outlook account and Gmail account once you configure domain-based emails into your Outlook and Gmail.
How to configure domain-based emails into Outlook?
Outlook.com accounts can be set up using your existing domain-based email address instead of the traditional @outlook.com address. You can then send and receive emails using Outlook from your domain-based emails.
If you’re looking to synchronize messages, contacts, and calendar items between several devices, like a computer, laptop, netbook, tablet, or smartphone, then an Outlook.com account is an excellent alternative to your current POP3 or IMAP account. It acts like a free (hosted) Exchange or Office 365 for a Business account.
It will walk you through setting up an Outlook.com email account with your own current address and how to transfer your data.
Learn how to configure domain-based emails into Outlook from below:
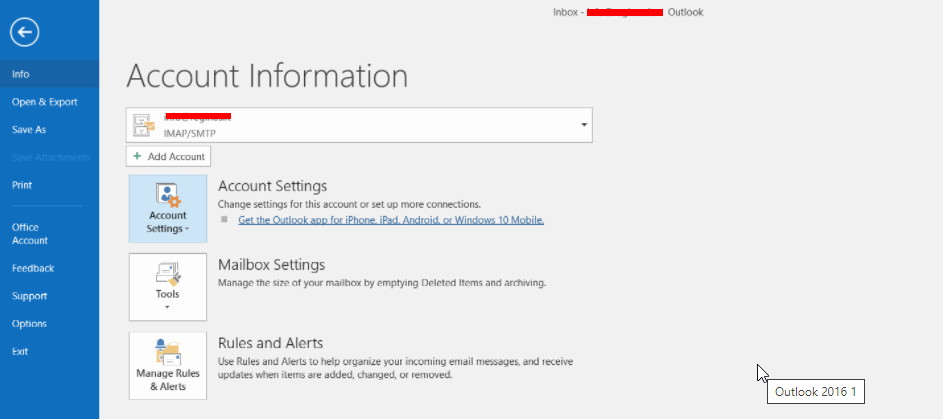
Step 1: Go to your Outlook.
Step 2: Navigate to File and Account then click on “Add Account”.
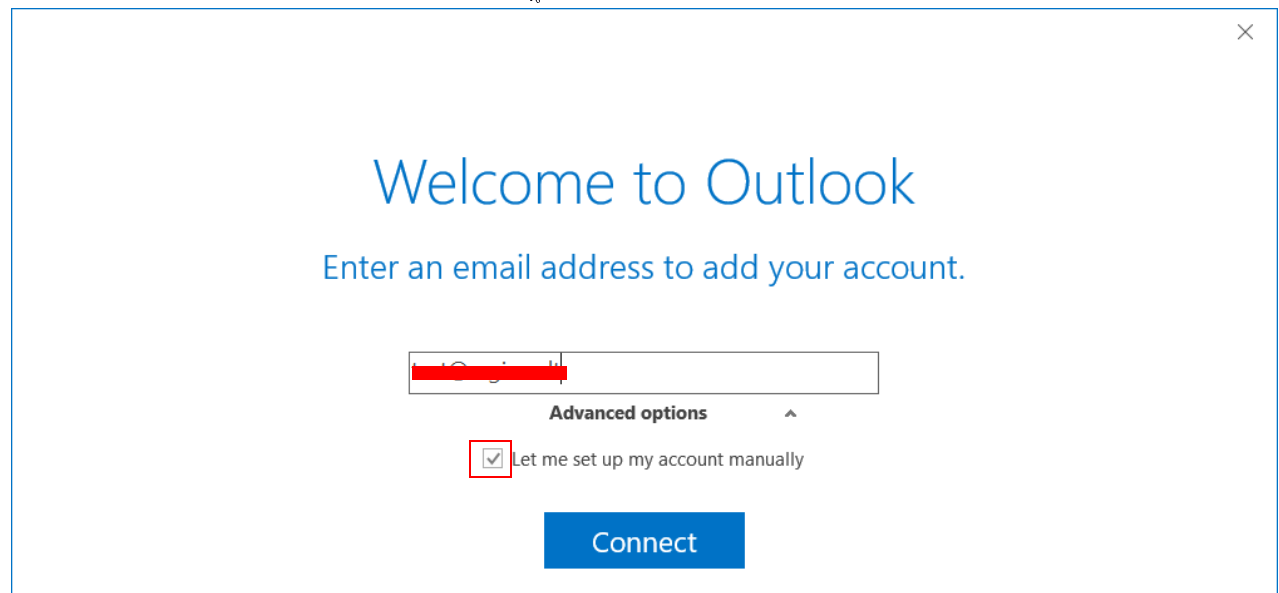
Step 3: Type in your Email address and then press “Advanced Options” -> check “Let me set up my account manually“.
Step 4: Select either IMAP or POP account types and log in.
If you choose IMAP. The below screen appears where you can set settings.
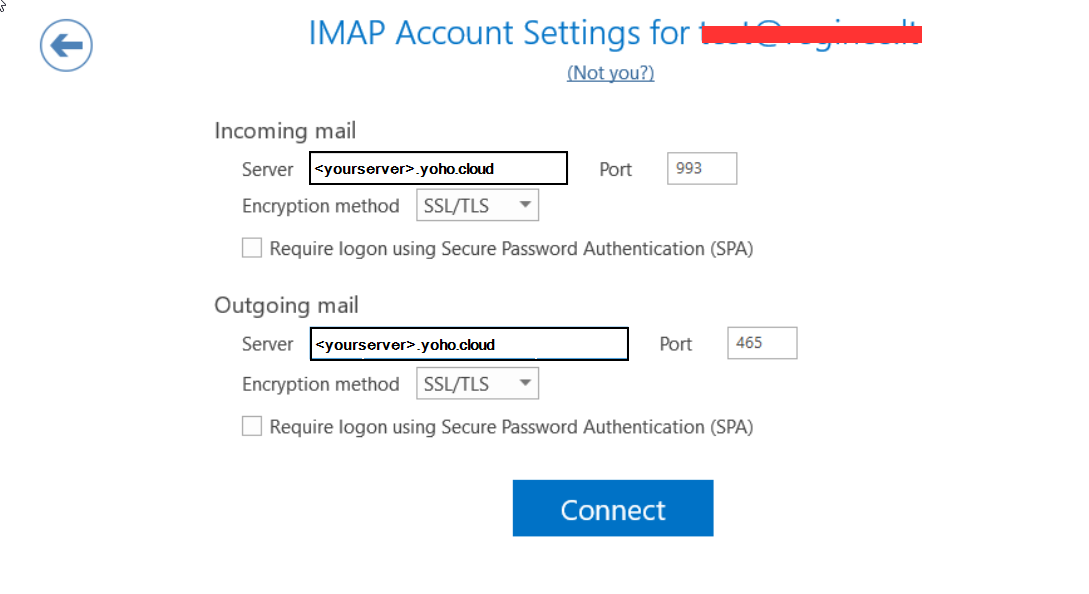
Enter the below details.
Incoming Mail Server (hostname): yourserver.yoho.cloud
Port: 993 (IMAP) or 995 (POP)
Encryption method: SSL/TLS
Outgoing Mail Server (hostname): yourserver.yoho.cloud
Port: 465
Encryption method: SSL/TLS
Step 5: Then click on the Connect button.
Step 6. In the “Password” field, enter your email address and click “OK”.
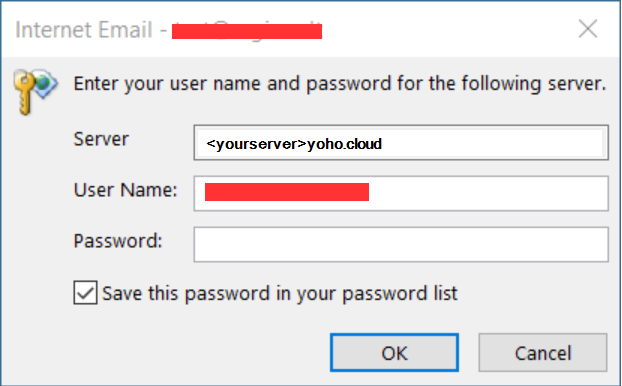
Step 7: Then you will receive an email from Outlook telling you everything is configured correctly.

It is expected that your email address already exists in your Control Panel. If you do not know your hostname (for example, demo.yoho.cloud), go to your hosting provider’s Client Area to verify. If you are using YohoCloud, your hostname is yoho.cloud, and if you want to verify it, you can check it on the YohoCloud Client Area.
How to configure domain-based emails into Gmail?
Getting Gmail mail configured is valuable and practical. All the advantages of Gmail are available to you, like the ability to link and verify multiple accounts. Use one Gmail account to handle all correspondence.
A lot more storage space is available with this than you can find in an email. Mail is accessed via an application. Besides, many business professionals find it convenient to sync their Gmail business email accounts with MS Outlook, Android, and iPhone through Gmail.
Check out these instructions for getting a business email address:
Here are instructions on adding your Yohocloud mailbox to Gmail.com.
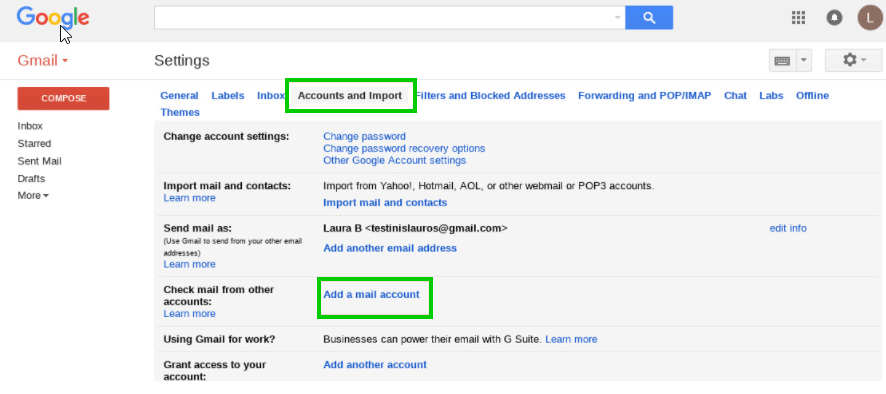
Step 1: Sign in to your Gmail account and choose “Settings”.

Step 2: Click on “Accounts and Imports“ and then select “Add a mail account“:
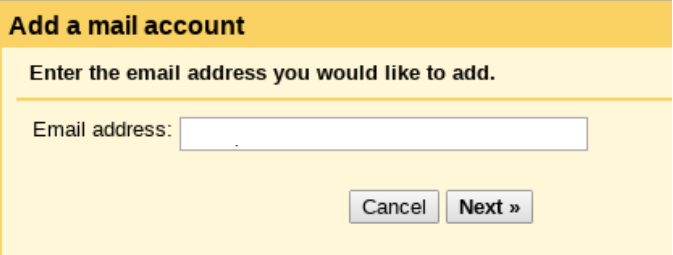
Step 3: Enter your full email address and select “Next“:
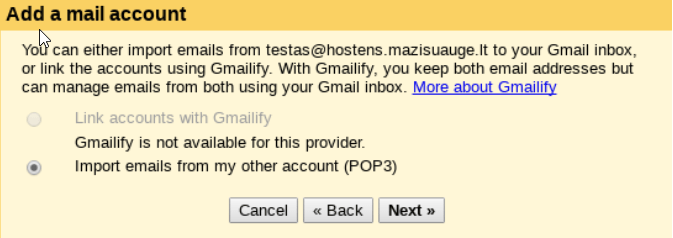
Step 4: Click on “Import emails from my other account (POP3)” and select “Next”:
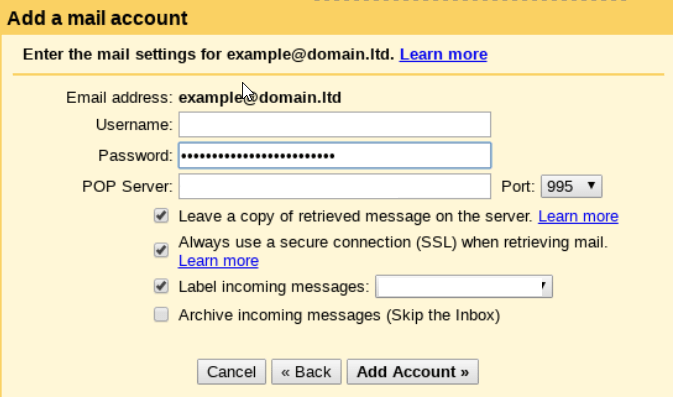
Step 5: Enter all the required information:
Username: Fill in your full email address;
Password: Fill in the password of your mailbox;
POP Server: “your_server.yoho.cloud”
Port: 995
Make sure “Always use a secure connection (SSL) when retrieving mail“.
You will be able to see your sent messages if you mark “Leave a copy of the retrieved message on the server.”, otherwise, the message will be deleted.
Incoming messages for a single mailbox will be displayed if “Label incoming messages:” is selected.
It is important to note that your Email should already exist in your Control Panel. Furthermore, if you are unsure what your hostname is (for example, demo.yoho.cloud), you can see it by clicking on the Hosting Services heading in your Client Area.
How to configure “Send mail to:”
Your sending parameters must be configured if you wish to reply from your additional mailbox.
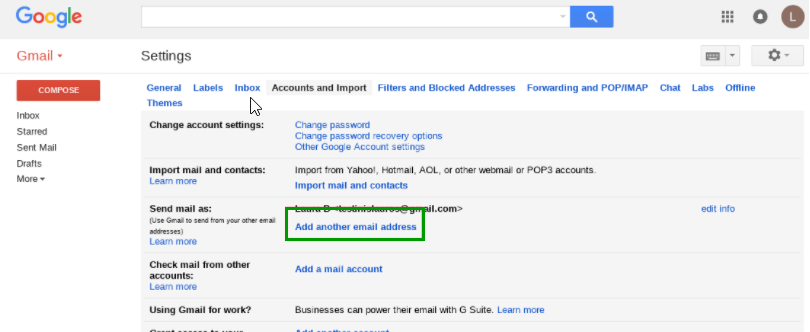
1.To add another email address, log in to your “Gmail” account and then choose “Settings” -> “Accounts and Import”:
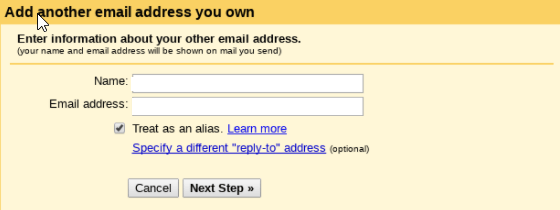
2. Enter the recipient’s name and full email address. Adding another address to your Gmail account for sending messages typically affects the method of sending messages the same as adding an alias to your original Gmail address. In cases where you’re sending on behalf of another person, it may be a good idea to uncheck the Treat as an alias box and then to choose “Next step”:
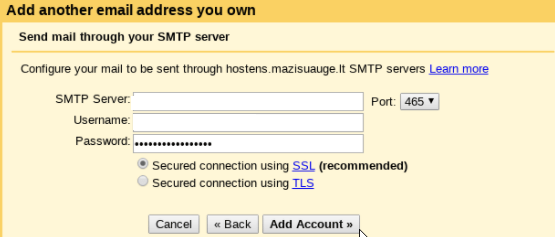
3. Fill in the following information on the next page:
SMTP server: “your_server.yoho.cloud”
Port: 587
Username: Enter your full email address
Password: Enter your mailbox password
Click on “Secured connection using TLS” and then “Add account”:
4. The verification code was sent to your inbox, so enter it there and click “Verify”:

5. You can now choose which mailbox you want to reply from:
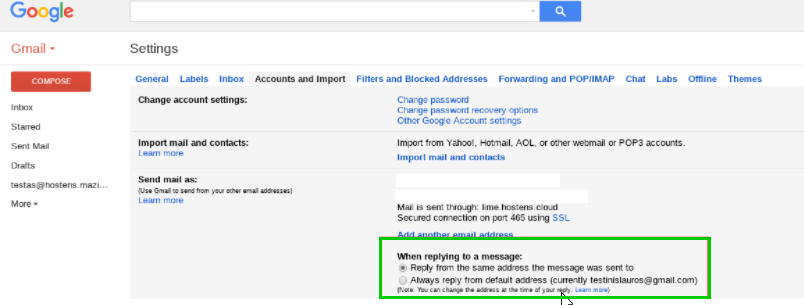
Therefore, like this, you can configure your domain-based email address into Gmail. Now you can easily use your Gmail to respond to your clients and send emails for new updates.

How to connect the domain to Blogger?
Editorial StaffHow to make an eCommerce Website within a few minutes?
Editorial Staff