

Contact
Kathmandu,Nepal
9745652548 / 49
Table of Contents
In WordPress, emails are sent using a mail function called ‘PHPMail()’, which has the drawbacks of sending emails in the recipient’s SPAM folder. Most of the WordPress Hosting providers disable PHP mailer which leads to WordPress emails being undelivered.
So, to fix this problem, you can use other third-party email services for sending emails. These third-party mails cost increase as your number of sending emails increases which will be so costly. But not to worry because here comes SMTP, which will avoid both problems, i.e.:
- There will be no problem with email spoofing or undelivered.
- It doesn’t cost a separate extra charge; instead, it will come with a hosting package.
Thus, it is always suggested to use SMTP for sending emails from WordPress.
Steps to Configure WordPress to use SMTP for Sending Emails
Whenever you host your domain from any hosting company, you get email services along. With that, you will be able to create domain name email accounts like info.yohocloud.com.
To know how to configure WordPress for sending emails using SMTP, we need:
- Domain Email Accounts
- WordPress Plugin: SMTP Mail
Below, we will explain how to set up or create email accounts and WordPress plugins to send emails using SMTP.
Steps to Create Email Accounts in Cpanel
Below we have steps to create an email account from cPanel:
Step 1: Sign in to your cPanel, go to the “EMAIL” section, and click on Email Accounts.

Step 2: Below window will appear where you can create an email account.
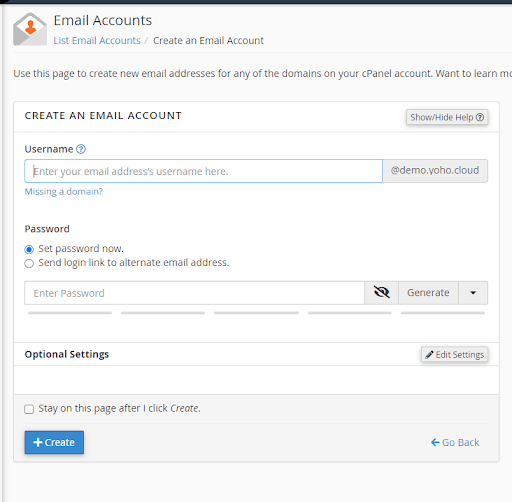 Enter the username you want to with the domain and set a strong password to create your email account.
For example : Username: [email protected]
Password:domain@##$685
Step 3: Then click on the Create button.
Like this, you will be able to Create an email account with your domain.
Email Configuration Details to Configure in WordPress
Once you create an email, your mail address will be shown below, like in the screenshot.
 Click on the Connect Devices button. Then below the window appears to get the SMTP configuration details required to connect your email client to your mailbox.

This is for Secure SSL/TLS Settings.
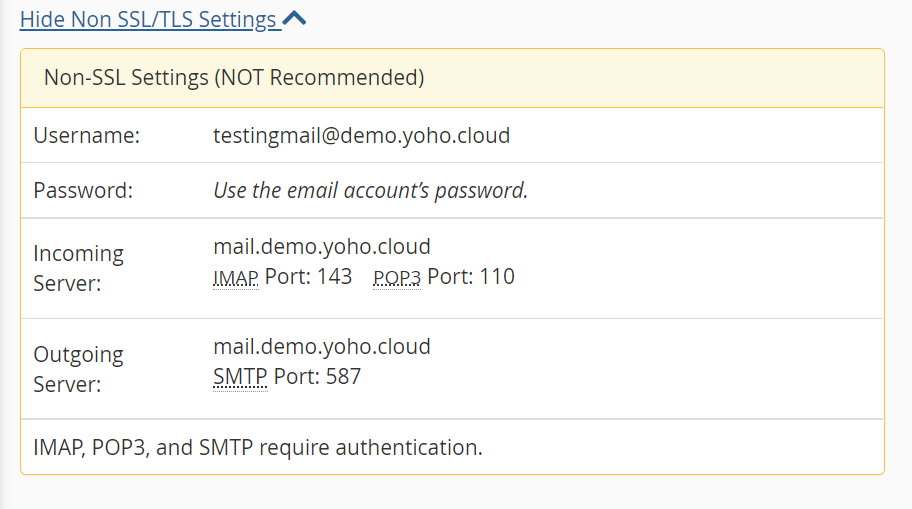
This is for Non-SSL Settings. However, it is not recommended to use.
Important: You need to know the SMTP Host and SMTP Port for further configuration.
However, you can also get this configuration information from your hosting provider, or you can directly get email instructions from your cPanel.
Using WordPress Plugin: SMTP Mail in WordPress
Now you have to install the SMTP mail plugin on your WordPress site. Follow the below steps:
- Login to your WordPress site.
- Go to Plugins> Add New Plugin > Search SMTP mail
- Install SMTP mail plugin and Activate it.
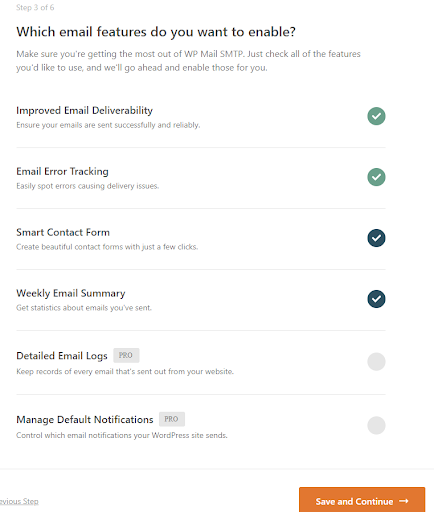
- Then the screen below appears. Select the Other SMTP for your mailer option and Click Save and Continue.

- After that, the window below appears. Fill in the information like shown in the image below.

- Enter all the information, and you can get these from cPanel or the hosting provider.
Below is a sample to help you fill in the required pieces of information:
SMTP Host: mail.yohocloud.com (replace yohocloud.com with your own domain name).
Encryption: TLS (Recommended)
SMTP Port: 465 (must for SSL)
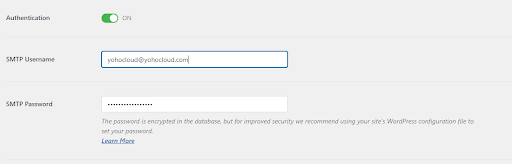
Toggle on Enable Authentication
SMTP Username: [email protected] (use your email address for username)
SMTP Password: *************
- Next, you need to add From Name, which is used as the sender name. And From Email, which is used to send email. Then, click Save and Continue. You can see that in the screenshot below.
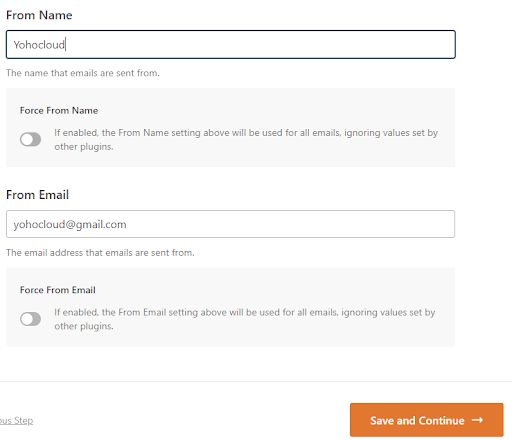
After that, the below screen appears. Click Save and Continue. Then skip some steps and continue.
Finally, it’s all set for SMTP mail to send emails.
Like this, WordPress configuration for email sending is done using SMTP.
Verifying Your SMTP Settings
Once you have completed setting up for SMTP mails, verify if that mail works or not.
- Go to WordPress Dashboard, Click on WP Mail SMTP Plugins > Settings, and Select Email Test.
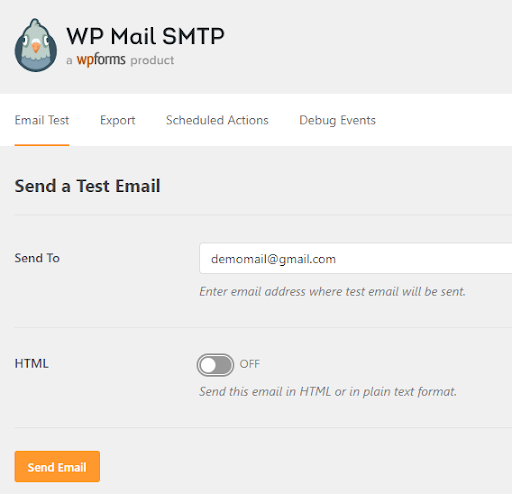
- Enter the valid email address where you want to send mail and the mail address. Make sure you can access that mail address to check email.
- Then, Click on Send Email.
WordPress Mail SMTP now sends an email using the SMTP settings you entered earlier. Upon successful email delivery, a success message appears.
How to Fix WordPress Email Problems?
Below are some of the tips to fix WordPress email problems:
- Make sure you use the correct SMTP host or port provided by the hosting provider.
- Ensure if you have selected the right encryption: TLS or SSL; however, we recommend using TLS.
Benefits of using your web host’s mail servers for WordPress emails
- You can use your domain-based email address to send emails in WordPress, somehow leading to brand name recognition.
- No extra cost for it since it is already included with your hosting account.
- No need for third-party mail service and any extra money for sending and receiving emails.
Drawbacks of using your web host’s mail servers for WordPress emails
- There are hosting providers who impose email limitations. Due to this, we do not recommend WordPress for newsletter emailing.
- If email delivery delays, you should consider using a third-party email service such as Google Apps for Work, Mailgun, or SendGrid.
Therefore, make sure to get the hosting packages from the best and cheapest hosting provider and set up the configuration in WordPress to use SMTP for sending emails.

How to install WordPress using Softaculous?
Editorial StaffHow to Reset WordPress Admin Passwords Using Phpmyadmin ?
Editorial Staff