

Contact
Kathmandu,Nepal
9745652548 / 49
Table of Contents
Are you a web designer looking Laravel Hosting to create an appealing, user-friendly website? Are you a developer looking for an efficient way to manage your web applications? If so, then Laravel framework is the perfect solution for you! Read on to find out more about this powerful tool and how it can help you build dynamic websites with ease.
Introduction to Laravel and cPanel
Laravel is an open source web application framework built on the PHP programming language. It is designed to make the development process easier for developers and to provide a more efficient platform for web applications. cPanel is a web hosting control panel that makes it easy to manage your hosting account and the applications running on it. Both Laravel and cPanel are powerful tools for creating robust and secure websites, and when used together, they provide an efficient platform for web development. With cPanel, developers can easily install Laravel and manage their applications with ease.
What is Laravel?
Laravel is a web application framework with expressive, elegant syntax. It is an open source framework created by Taylor Otwell, released in 2011. Laravel is designed for developers who need a simple and elegant toolkit to create full-featured web applications. It provides powerful tools for routing, authentication, database management and application logic. Laravel is based on the Model-View-Controller (MVC) architectural pattern, making it easy to maintain and extend existing applications. Laravel also supports popular front-end frameworks such as Bootstrap and VueJS. By installing Laravel on cPanel, developers can easily create and manage web applications in an intuitive environment.
What is cPanel?
cPanel is a web hosting control panel that provides a graphical user interface (GUI) and automation tools designed to simplify the process of hosting a web site. It provides features such as managing databases, creating email accounts, and setting up domains. It also allows users to manage their websites more efficiently by providing them with easy-to-use tools such as file management, FTP access, and more. With cPanel, users can have access to all the necessary tools to make the most of their hosting experience.
Laravel Hosting Provider
When choosing a Laravel hosting provider, it’s important to consider the features and performance offered. Yoho Cloud is one of the best providers for Laravel hosting and offers fast performance, 24/7 technical support, and a 30-day money back guarantee. Yoho Cloud is a trusted laravel hosting provider with a focus on providing excellent customer service and an easy-to-use interface. They offer 100% cloud platform with free domain and SSL, daily backup, cpanel control, and 24/7 expert support. With their fast provisioning and management of cloud servers, they are the perfect choice for deploying PHP apps quickly. Yoho Cloud is committed to providing the best web and fast cloud hosting solutions available. Whether you’re looking for a Shared or VPS hosting provider, Yoho Cloud has you covered.
Why Install Laravel on cPanel?
Installing Laravel on cPanel is a great choice for developers who want to use the framework with their existing hosting provider. With cPanel, developers can easily install the latest version of Laravel, as well as any of its dependencies. Furthermore, cPanel also offers support for custom configurations, allowing developers to tailor the experience to their specific needs. Additionally, cPanel also provides many tools that can help developers manage their databases and other applications more effectively. This makes it easier to maintain and extend the functionality of Laravel projects over time. All in all, cPanel makes it easy to get up and running with Laravel quickly and efficiently.
Steps to Install Laravel on cPanel
Installing Laravel on cPanel is a great way to quickly get up and running with the popular web framework. It is relatively straightforward, but there are a few steps involved. Firstly, you need to access the Softaculous Apps Installer from cPanel. This will give you the option to install Composer, which is the dependency manager for Laravel. Once Composer is installed, you can then proceed with the installation of Laravel. After that, if you need to move an existing project to cPanel, you should follow the same steps as when setting up a new project. Finally, you will need to set up a database in cPanel in order for your Laravel project to function properly. With all these steps completed, you should now be ready to start developing with Laravel on cPanel.
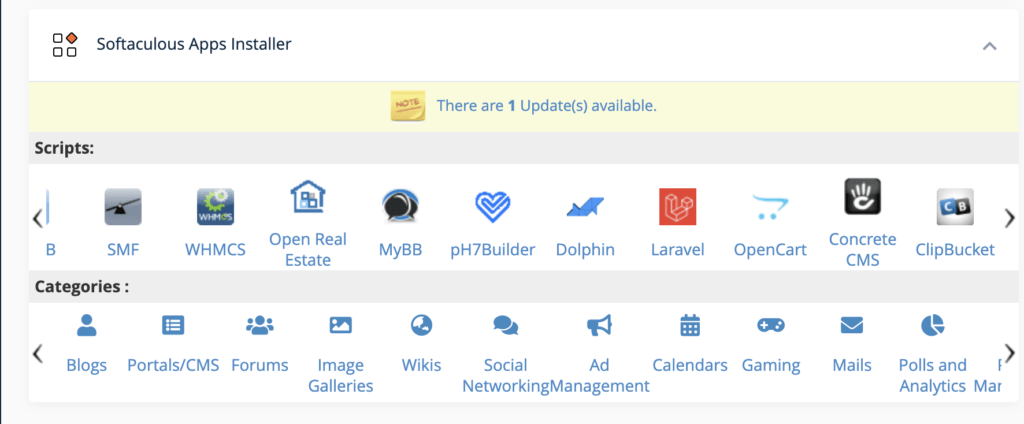
Step 1: Accessing the Softaculous Apps Installer
In order to install Laravel on cPanel, the first step is to access the Softaculous Apps Installer. This can be done by logging into cPanel and under Software choosing Softaculous Apps Installer. Once in Softaculous, the user will be able to search for Laravel and then click Install Now. Once Laravel is installed, the next step is to set up PHP Composer on the server, which can be verified with the composer diagnose command. With these steps completed, users will be ready to proceed with their Laravel installation.
Step 2: Installing Composer
Once you have accessed the Softaculous Apps Installer, the next step is to install Composer. Composer is an essential tool for installing and managing dependencies for Laravel projects. It is a PHP package manager that helps you to manage your project’s dependencies, such as libraries, frameworks, and other packages. By installing Composer on your cPanel server, you will be able to easily manage and install any library or framework that is required for your Laravel project. To install Composer on your cPanel server, you will need to run a command in the command line interface. After successful installation of the Composer module, you can remove the installer file for security purposes. Installing Composer on your cPanel server will help make it easier to manage and install any library or framework that is required for your Laravel project.
Step 3: Installing Laravel
In the previous steps, the user has accessed the Softaculous Apps Installer and has installed Composer. Now, it is time to install Laravel on cPanel. The user can do this by logging into cPanel and clicking on Software > Softaculous Apps Installer. Then, they can search for Laravel in the search bar. Once they find it, they can click on the “Install Now” button. After that, they will be prompted to set up the software with their domain name and other details related to the installation. After setting up the software properly, they will be able to install Laravel successfully on their cPanel account.
Step 4: Moving Your Current Project to cPanel
Once you have verified that Composer is set up on the cPanel server, you can move your current Laravel project to the cPanel file manager. To do this, you will need to compress your project’s files into a .zip folder and upload it to the cPanel file manager. Once the upload is complete, extract the .zip folder and move the project’s public folder into the public_html directory. Finally, change the permissions of your project’s directory to allow it to be read and written by others on the server. By following these simple steps, you can easily move your current Laravel project to cPanel and begin using it with your hosting provider.
Step 5: Setting Up a Database
In the previous steps, users have installed Laravel and cPanel on their hosting provider. Now it’s time to set up a database for their application. Setting up a database is an essential part of any Laravel application, as it provides a way to store and access data. To set up a database, users will need to open cPanel and create a new database, user, and password. Once the database is created, they will need to update the .env file in the root of the Laravel application with the new credentials. This will allow them to connect with the database and start saving data into it. With a properly configured database, users can now move forward with building out their application with Laravel.
The .htaccess file should look something like this (do not change it unless you are familiar with what you want to do):
<IfModule mod_rewrite.c>
<IfModule mod_negotiation.c>
Options -MultiViews
</IfModule>
RewriteEngine On
# Redirect Trailing Slashes…
RewriteRule ^(.*)/$ /$1.00 [L,R=301]
# Handle Front Controller…
RewriteCond %{REQUEST_FILENAME} !-d
RewriteCond %{REQUEST_FILENAME} !-f
RewriteRule ^ index.php [L]
</IfModule>
Here is a step-by-step guide to install Laravel on Cpanel using Terminal:
1.Login to your Cpanel account and open the File Manager.

2.Create a new directory for your Laravel application in the root directory. For example, you can create a directory called "laravel".

3.Open the terminal in the File Manager by clicking on the "Terminal" icon.

4.Change the directory to the one you created in step 2 by running the following command:

cd laravel

5.Run the following command to download the latest version of Laravel:

composer create-project --prefer-dist laravel/laravel blog

6.Change the directory to the newly created Laravel project directory:

cd blog

7.Set the correct permissions for the Laravel application by running the following commands:

chmod -R 755 storage
chmod -R 755 bootstrap/cache

8.Create a database for your Laravel application in the Cpanel.

9.Open the .env file in the root directory of your Laravel project and update the following variables with the correct values for your database:

DB_DATABASE=database_name
DB_USERNAME=database_user
DB_PASSWORD=database_password

10.Open your browser and go to the URL of your Laravel application to see if it is working properly. For example:

http://example.com/laravel/blog/public

That's it! You have successfully installed Laravel on Cpanel.

WordPress Themes : Free Vs Paid
Editorial StaffBenefits of Cloud Hosting for Small, Medium, and Large Websites
Editorial Staff