

Contact
Kathmandu,Nepal
9745652548 / 49
Table of Contents
There is nothing in the entire universe without problems, so the internet is not an exception. You may have faced different errors showing like 404, 503, 403, and many more while accessing the website. All of these errors are status codes telling different issues, and not to worry, they can be resolved too. However, in this blog, we will only talk about 403 errors and how to fix 403 errors.
What is the 403 Status Code?
This 403 status code error indicates that you are not granted permission to access or open the website or information you are trying to access.
How to fix 403 errors after successful login to WordPress dashboard?
You can easily fix 403 errors after successful login to WordPress Dashboard. For this, you need a cPanel login and WordPress login credentials. Then follow the below steps.
- Open your cPanel account.
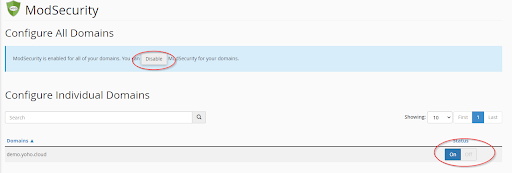
- Scroll down to the SECURITY section and click on ModSecurity.

- To disable security for the entire cPanel, click “Disable” at the top. Alternatively, you can disable it for a specific domain by clicking on the corresponding switch under “Status” and marking it off.

- When you click either of these options, you’ll see a warning and a success message on your screen, as shown below.
- By removing one layer of security, you should be able to log in to the WordPress dashboard. Instead of refreshing the same page, close the window and open it again to log in. ModSecurity is a web application firewall that protects your website against certain types of attacks. The system scans websites individually (when enabled) and examines traffic based on rules selected by the system administrator and supplied by the vendor. We use Imunify360 as our ModSecurity vendor. It’s like you’ve taken a layer of security down. So now you can insert a replacement for the same in your dashboard. If you want to secure your website, this is not necessary but highly recommended.
- Now login to your WordPress Dashboard.
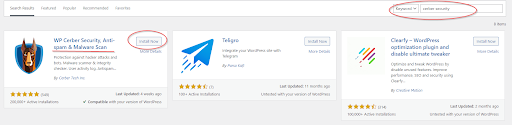
- Go to Plugins and Add New.

- A window appears where you can search for Cerber Security, Anti-spam & Malware Scan on your right side on the search bar. Then, install and activate it.

- The plugin automatically whitelists your current active IP address. Congrats! You have successfully installed a new security system on your website.
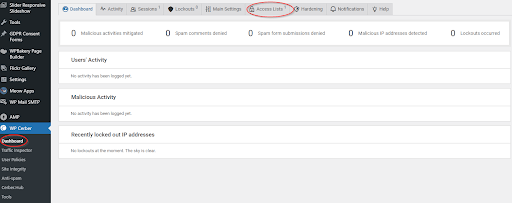
- If you want to add more IP addresses to the whitelist, go to the WP Cerber plugin shown on your right.

- Go to Dashboard and click on Access Lists, as shown in the above screenshot.
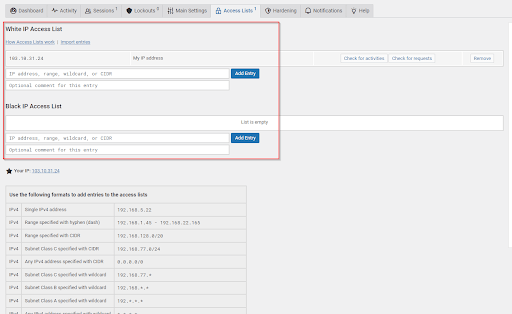
- Below screen appears. Input addresses you want to blacklist or whitelist.


Thus, in this way, you can fix 403 errors, and also, using Cerber Security, Antispam & Malware Scan plugin, you can auto whitelist your IP addresses and add more as you need.

Redirect HTTP to HTTPS using .htaccess
Editorial StaffReseller Hosting Nepal – New Edge Cloud Hosting
Editorial Staff